After successfully installing WordPress, the next thing to do is to install plugins. Do you know what a plugin is? A plugin is like an app for your WordPress site. They allow you to add, update, and manage features to WordPress such as SEO, calendar, reviews, online store, and more.
Plugins are needed to be able to support the content of the website being managed. That's why, when it comes to creating a professional website, many webmasters spend a lot of money on plugins. But if you're a WordPress user, especially a beginner, installing plugins in WordPress isn't that difficult!
This time, Exabytes will give you 3 easy ways to install WordPress plugins that you can apply to your own website!
What do you need to prepare?
Before we get into how to install WordPress plugins, you might want to prepare a few things. For the record, if you're a WordPress.com user, you won't be able to install plugins. This type of free WordPress does have some limitations, so if you want to install plugins, you have to upgrade to a premium plan.
You can also check out the differences between WordPress.com and WordPress.org below for more information.
3 Ways to Install Plugins in WordPress
In this article, Exabytes will provide a guide on how to install plugins in WordPress using three methods, namely installing WordPress plugins by uploading plugins in WordPress, installing them manually using FileZilla (FTP), and through the search method. Check out the full guide below!
1. Install Plugin with WordPress Plugin Upload
Paid WordPress plugins are not listed in the plugin directory in WordPress. Therefore, they cannot be installed by simply searching for them in the plugin search field. Therefore, WordPress provides this upload method so that webmasters can install plugins that are not listed in the WordPress dashboard. Here is how to install a plugin by uploading it:
Step 1: download the plugin you want via its source (which will be a zip file).
Step 2: go to the WordPress admin dashboard and click the Add New sub menu on the plugin menu.
Step 3: click on the Upload Plugin option at the top of the page.

Step 4: Click the Choose File button and then select the plugin file that was downloaded earlier.

Step 5: After successfully selecting the files, click the Install Now button. The WordPress system will now start uploading the plugin file from your computer. If the file is successfully downloaded, WordPress will notify you with a message that the plugin file was successfully downloaded.
Step 6: Once the plugin is fully installed, it does not activate automatically. Click Activate
Plugin first to start using the plugin.

2. Install WordPress Plugins Manually
The second way to install WordPress plugins is manually. This method requires the help of a third-party application called FileZilla (FTP).
Eitss, how to install wordpress plugins manually is not too difficult! Please follow the detailed guide below!
Step 1: Upload the compressed file as a .ZIP. Then extract the file on your computer.
By extracting the zip file, the data contained in it will immediately turn into a new folder with the same name as the plugin file. The files contained in this folder will then be uploaded manually using FTP on the website.
Step 2: To upload it, simply access the FTP application and enter your FTP username and password. If you don't know either of these, you can contact your WordPress hosting provider..
Step 3: After logging in to your FTP account, please check the following folder on the website folder/wp-content/plugins. Then upload the folder you extracted earlier to the/wp-content/plugins folder on your hosting server..

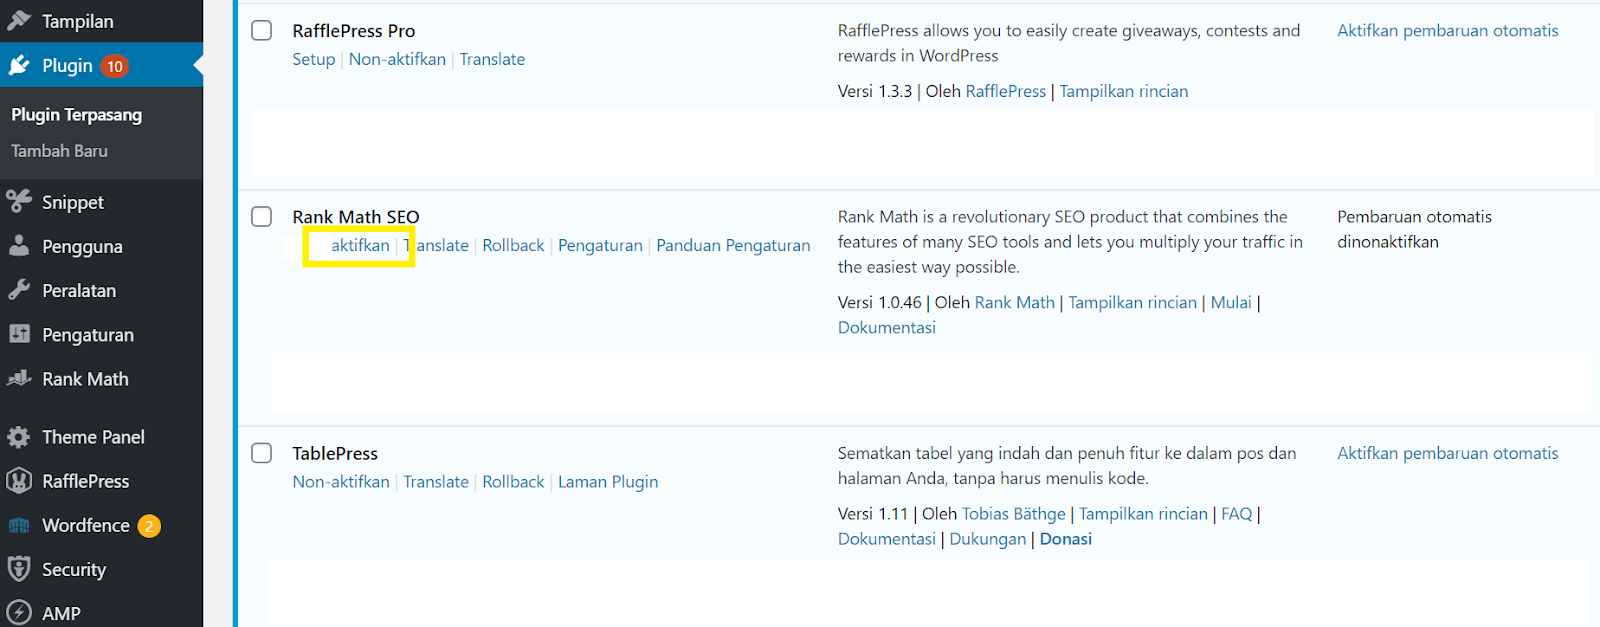
Step 4: Once the file has successfully uploaded, visit the WordPress admin dashboard. Click on Plugins > Installed Plugins. On that page, you will see the plugins that have been successfully installed on the plugins page.
To activate it, you can click the Activate button under the plugin to start operating it. After that, you can make further settings for the plugin that you can customize according to the content of the website you manage.
3. Install Plugin Using Search Method
The easiest way to install WordPress plugins is by using the plugin search method. However, to use this method, your desired plugin must be found in the WordPress plugin directory as they are restricted to free plugins only.
Step 1: Visit the Plugins page, then select Add New within the WordPress admin dashboard.

Find the plugin by typing in the desired plugin name.
Step 2: After finding the plugin, click the Install Now button.

WordPress is now downloading and installing the plugin.
Step 3: Once successfully installed, you'll see the Install Now button change to an Activate button. Click the Activate button to start using the plugin on your WordPress site..

Conclusion
Now you know how to install WordPress plugins. Isn't it easy?
When managing your website, don't forget to do regular WordPress backups and maintenance!