Changing fonts in WordPress can be done manually by customizing CSS, or automatically by installing a plugin. In this guide, we'll share how to change WordPress fonts using a plugin because of its simplicity and more complete font options.
List of Best WordPress Font Plugins
Here are some font plugins in WordPress that you can use.
1. Font Plugin | Google Fonts Typography
Fonts Plugin is a plugin that allows users to use thousands of Google Fonts on the website. With this plugin, users can also make settings via live preview on the WordPress Customizer.
In the Pro version, you can perform advanced customizations such as third-party font uploads, font size and color changes, and optimization features.
2. Use Any Font
Use Any Fonts allows users to upload their own fonts with ttf, eot, and woff formats. In order to be used, this plugin requires verification using an API Key that you can get for free.
In addition, you can also use the Pre-Defined fonts available. This plugin provides a Premium version if you want to use more than one type of font.
3. WP Google Fonts
WP Google Fonts plugin makes it easy for users to use fonts provided by Google for free. This plugin helps you to apply up to 6 different fonts from Google Fonts to CSS elements via the WordPress Dashboard.
How to Change Fonts in WordPress
In this guide, we'll share how to change fonts in WordPress with the 3 plugins we mentioned earlier. Here's the full information.
Using Fonts Plugin | Google Fonts Typography
- On the WordPress Dashboard, please select the Plugins > Add New menu. Then click the Add New button.
- In the search field type Fonts Plugin.
- Select Fonts Plugin | Google Fonts Typography as shown.

- Click the Install Now button to download the plugin, then click Activate.
- Once the plugin is active, you can use it through the Appearence > Customize menu.

- You can set the font in the menu provided as shown below and immediately see the Live Preview.

- When you're done choosing the desired font, don't forget to click the Publish button to apply the changes.
Using Use Any Font
- On the WordPress Dashboard, please select the Plugins > Add New menu. Then click the Add New button.
- In the search field type Use Any Fonts.
- Select Use Any Font | Custom Font Uploader.

- Click the Install Now button, once installed then click the Activate button.

- After activating the plugin, please click the Use Any Fonts menu.

- To use the plugin you need to Generate API Key, click the Generate Free Lite / Test API Key button to generate API.

- After the API is successfully generated, please click the Verify button.
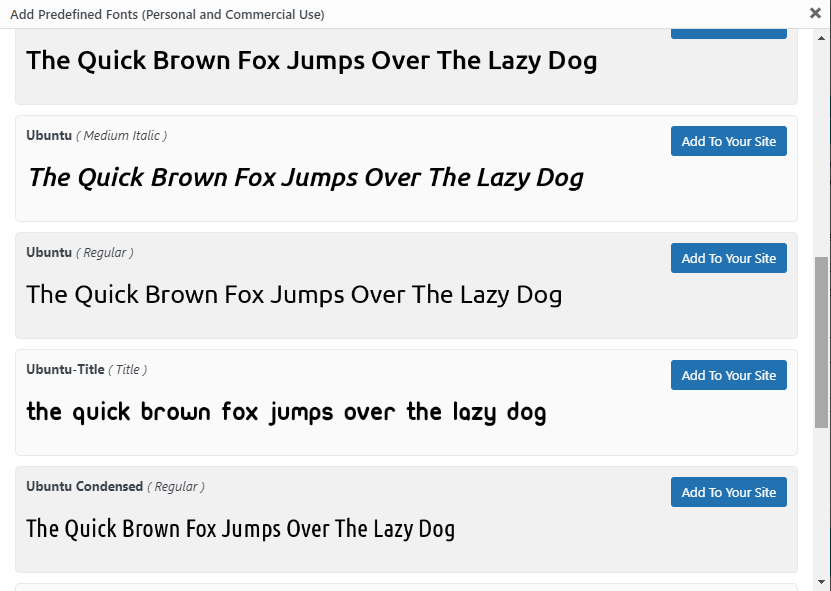
- You can then upload or use Predefined Fonts. In this guide, we use Predefined Fonts.

- Please specify the font to be used, in this guide we will use the Ubuntu Regular font. Click the Add To Your Site button.
- Next, go to the Assign Font tab, then click the Assign Font button.

- In the Select Font option, select the font used, then check the elements that will use the font. After that, click the Assign Font button to save the settings.

Method 3. Using WP Google Fonts
- On the WordPress Dashboard, please select the Plugins > Add New menu. Then click the Add New button.
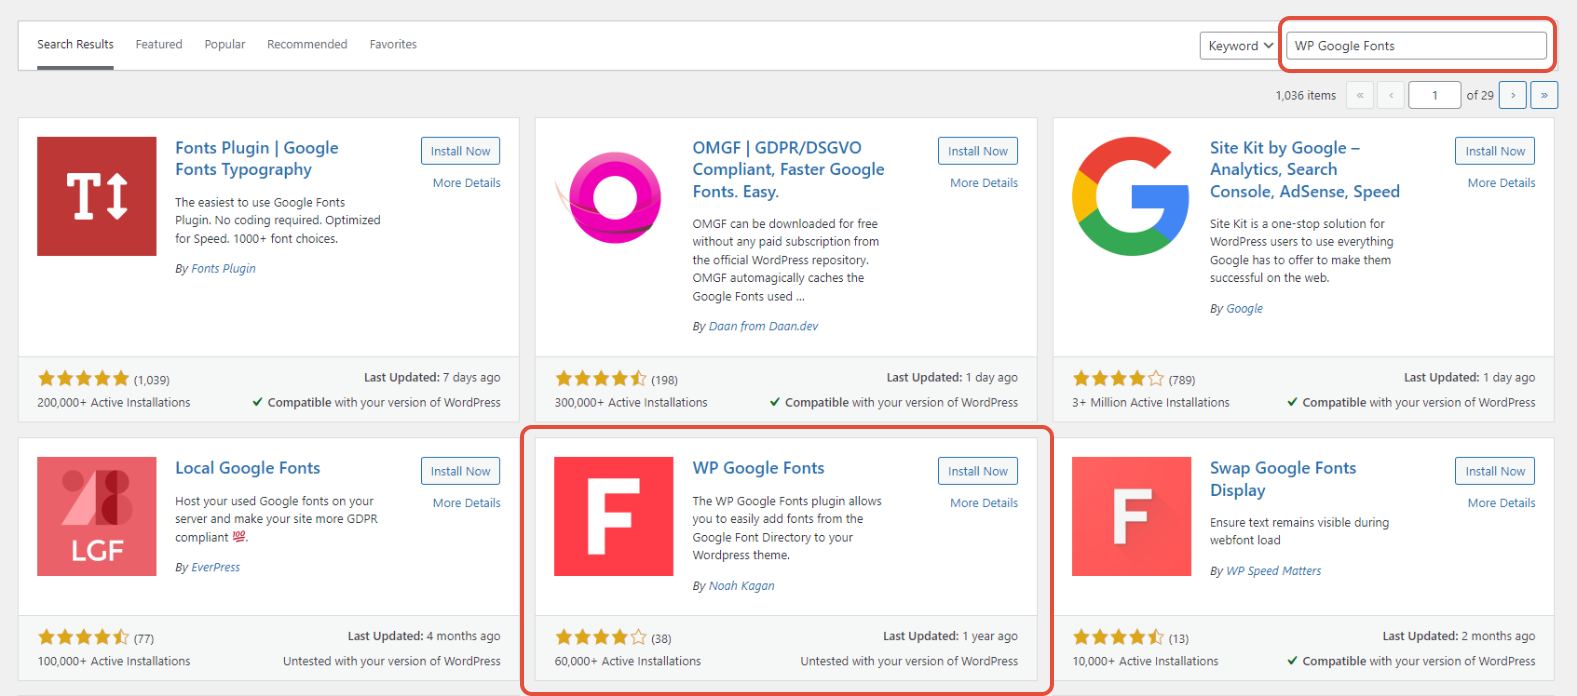
- In the search field type WP Google Fonts.
- Select WP Google Fonts .
- Klik tombol Install Now, setelah terinstal lalu klik tombol Activate untuk mengaktifkan plugin.

- Next you can do the settings by clicking the Google Fonts menu.
- Please select the Font to be used, then check the element that will use the font.

- After that, click the Save All Font button to save the changes.
This is a guide on how to change fonts in WordPress, hopefully it's useful.