What Causes the 'Image post-shooting processing most likely failed' Error?
When adding an image to a post or media library on your WordPress site, a few things happen. The image file is uploaded to your WordPress hosting server, an attachment page is created for the image, and PHP image editing does some Post-processing
Sometimes during the image upload process you might see a WordPress error message like this:
‘Post-processing of the image likely failed because the server is busy or does not have enough resources. Uploading a smaller image may help. Suggested maximum size is 2500 pixels.’
For WordPress this error message provides quite a lot of details. It tells you that the problem occurred during image post-processing in WordPress and indicates there may be a problem with your web server.
The error message also suggests possible solutions. We recommend that you upload smaller images with the longest size not exceeding 2500 pixels.
With that said, let's see how to fix the 'Post-processing of the image likely failed' error in WordPress.
1. Make sure the HTTP Error is Not Temporary
First, you should make sure there are no special characters in the file name. If so, then you should rename the image file.
Next, you should wait a few minutes and then try uploading your image file again. If your server is busy as suggested in the message,
Issues like this are automatically fixed on most WordPress hosting servers.
If you are still having image uploading issues after waiting for a while, you can try uploading another file. You can also try clearing your browser cache or using a different web browser.
2. Increase WordPress Memory Limit
The error message indicates that your server may not have enough resources. Let's increase the amount of memory available to WordPress.
You need to increase the amount of memory that PHP can use on your server. You can do this by adding the following code to your wp-config.php file.
define( 'WP_MEMORY_LIMIT', '256M' ); This code increases WordPress' memory limit to 256MB, which should be enough to fix the memory limit issue.
If you want to check if a file is larger than your website's upload limit. To see it you can look at the image below:

3. Optimize Images to Make them Smaller
The error message says that uploading a smaller image might help. It is recommended that your images are no larger than 2500 pixels.
When starting a new blog, many beginners simply upload images without optimizing them for the web. Not only can it cause error messages like this, those large image files will also make your website slower.
Having a slow website will hurt your overall SEO ranking.
To optimize images, you need to use image editing software to save in an optimal file format (such as JPEG, PNG, or GIF), resize the image dimensions to a smaller size, and compress the image to make the file size even smaller.
It is important to note that sometimes this error message can be seen even when uploading smaller images. If you see the error even when uploading optimized images, you should proceed to the next troubleshooting step.
4. Change the Image Editor Library Used by WordPress
WordPress post-processes images using two PHP modules, ImageMagick and GD Library. WordPress can use either of them depending on which one is available.
However, ImageMagick can experience memory issues that can cause errors when uploading images. To fix this, you can make GD Library your default image editor.
You can do this by simply adding this code to your theme's function.php file, in a site-specific plugin, or by using the code snippet plugin.
The easiest way to add this code in WordPress is with the WPCode code snippet plugin. It lets you add the code without editing your theme's function.php file, so you don't have to worry about your WordPress site breaking.
To get started, you need to install and activate the free WPCode plugin.
Once the plugin is activated, go to the "Code Snippets" + Add Snippets page from your WordPress dashboard.
Then, find the 'Add Your Custom Code (New Snippet)' option and click on the 'Use Snippet' button below it.

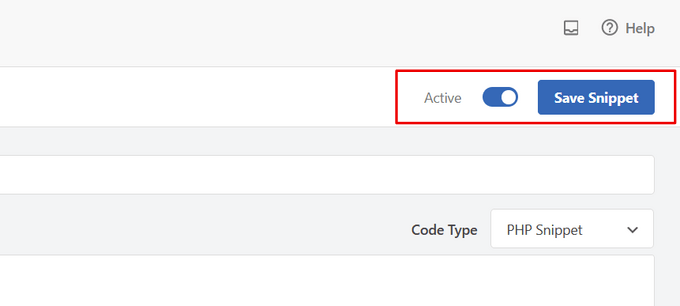
Next, you need to add a title for your snippet and paste the code from above into the 'Code Preview' box. Don't forget to select 'PHP Snippet' as the code type from the dropdown list on the right side of the screen.
After that, simply change the button from 'Off' to 'On' and hit the 'Save Snippet' button.

After adding this code, you should try uploading the image again.
That's all for now, we hope this tutorial helped you learn how to fix the Post-processing of the image likely failed error in WordPress.
