To access the File Manager, go to cPanel -> Files:

Tombol Bar File Manager

In this section, you can search for specific files in the selected directory and also change File Manager settings, such as selecting the root directory to open by default when you access the File Manager, displaying hidden files (dotfiles), and disabling the character encoding verification dialog.

- Home - returns to the directory created specifically for your hosting account. It contains all folders and files, such as public_html. The path is /home/your cPanel username.
- Up One Level - directs you to the folder above the currently accessed folder (depending on the directory tree).
- Back - directs you back to the previous directory.
- Forward - directs you back to the directory that was just closed.
- Reload - refresh the currently accessed directory (where files were uploaded/modified via FTP while File Manager was open and you want to see the results).
- Select All - selects all files in the directory.
- Unselect All - deselects all files in the directory.
- View Trash - view the files in the trash.
- Empty Trash - deletes all files from the trash folder.
Context Menu
The Context Menu will be activated once a file or folder is selected (right-click to see the same function):


- File - creates a file inside the currently accessed folder.
- Folder - creates a new directory.
- Copy - if this option is selected, the file or folder will be copied to the same or a different location. The process is almost similar to Move.
- Move - transfers the selected file or folder to another directory. To select a new directory, you just need to write its path and click Move File(s):
5. Upload - opens a pop-up window where you can select a new file to upload (maximum 256 MB).
6. Download - downloads the selected file or archive (maximum 256 MB).
7. Delete - permanently deletes the selected file or folder.
8. Restore - recover files or folders from the trash.
9. Rename - rename a file or folder:

10. Edit - mengedit file teks.
11. HTML Editor - membuka HTML files of visual HTML editor.
12. Permissions - sets the access rights (authorizations) on selected files and directories, i.e. read, write, or execute:

The default permissions value for files is 644 or:
- Owner – Read, Write
- Group – Read
- World – Read
The permissions value for the folder is 755 or:
- Owner – Read, Write, Execute
- Group – Read, Execute
- World – Read, Execute
13. View - view the contents of the file in a new window.
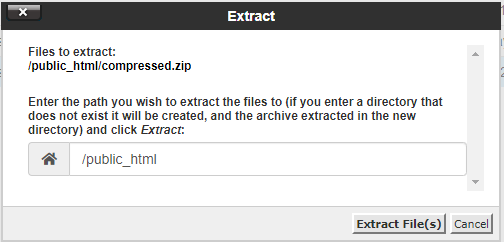
14. Extract - this option is only accessible after selecting a compressed file. This option allows you to extract the archive to the desired location:

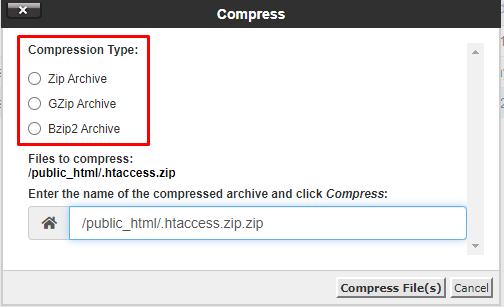
15. Compress - compresses a file or folder to archive format (the size of the compressed archive must not exceed 256 MB).
There are three formats to choose from:

CATATAN:
- Save the files and folders in the public_html folder, which is the root folder of the website. This way, the website content can be displayed. ?
- public_html is the root folder of your website. Therefore, do not delete this folder or its parent folders to avoid website corruption.
- If you accidentally delete a file, restore it immediately by performing a backup. Remember, this action is irreversible.
- If you want to move website files from one domain to another, read this guide.
- When renaming a file, do not delete its extension (for example, file.php becomes file). This will make the file inaccessible or unavailable.
- If no folder is specified, a folder will be automatically created.
- In the File Manager, you can extract archives less than 256 MB in size. If the size exceeds the specified one, extract it via SSH.
- If you can't compress files using File Manager or you want to compress large files, do it via SSH.
- How to upload backups with FTP
