In this tutorial, we will inform how to install and configure an SMTP server with Windows Server. This feature allows you to send emails either directly over the Internet or transferring to another SMTP server such as Exchange or Office 365.
SMTP (Simple Mail Transfer Protocol) is a service that enables email exchange on the Internet and within local networks. To achieve that, SMTP interacts with a Mail Transfer Agent (MTA) and ensures messages reach their intended recipients.
Here's to how to install and configure an SMTP server on Windows.
1. Add Roles and Features in Server Manager Dashboard
From the Server Manager, click Add Dashboard on the left panel
From the Dashboard, select the Add roles and features option to start the wizard and install the SMTP server.
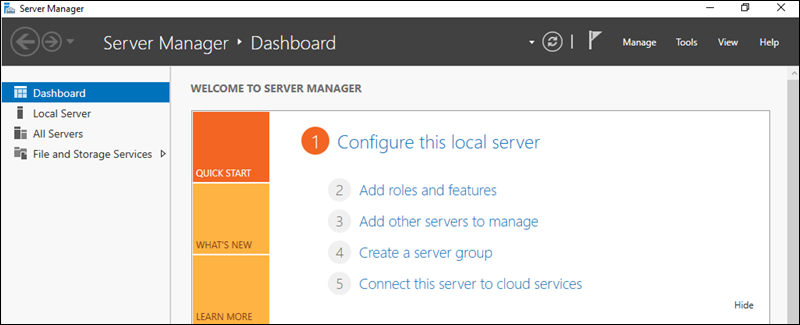
for the prerequisites of adding a role are:
- Having a strong password on the Administrator account.
- Configured network settings on the server.
- That you have installed the latest security updates.
If all the prerequisites have been met, click Next to continue the installation.

2. Select Installation Type
Select the type of installation to be performed, select Role-based or feature-based installation then click Next.

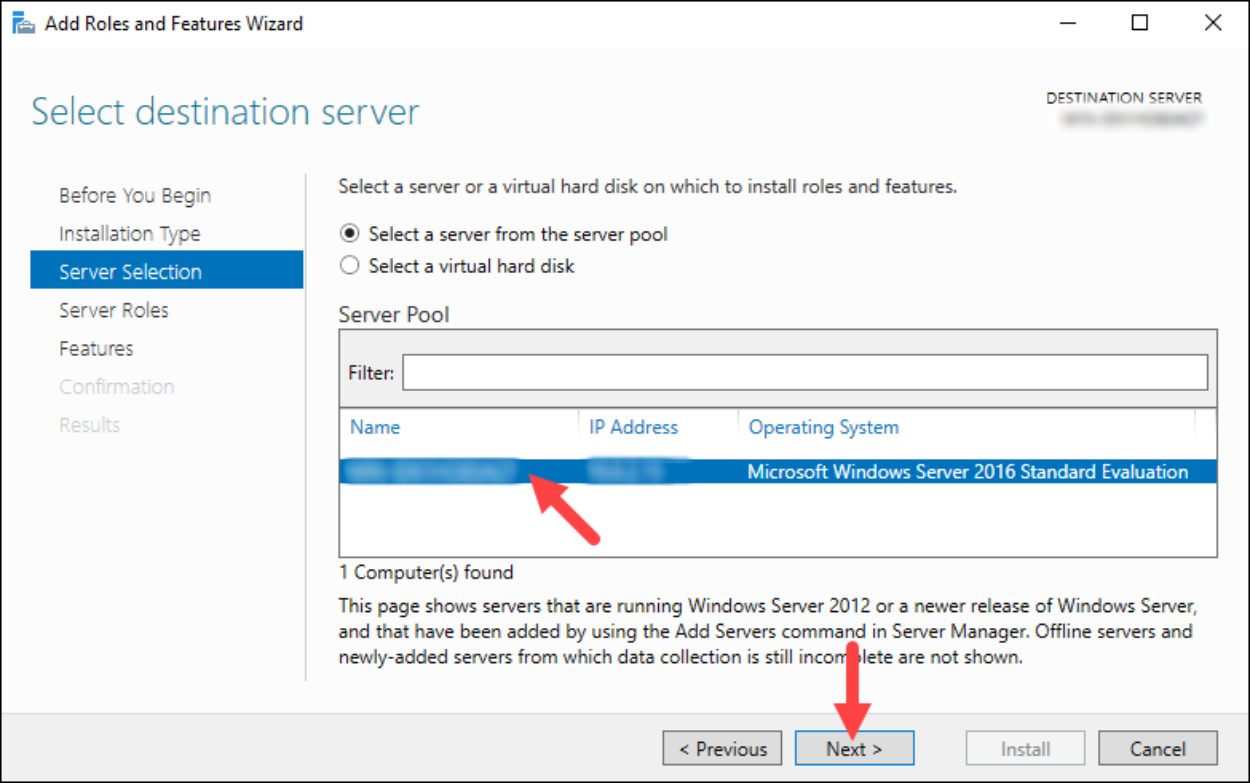
3. Select Destination Server
Select the server where the installation will take place and then click Next.
4. Select Server Role
Select a server that allows you to choose which features and roles to install. Keep the default selection and click Next.

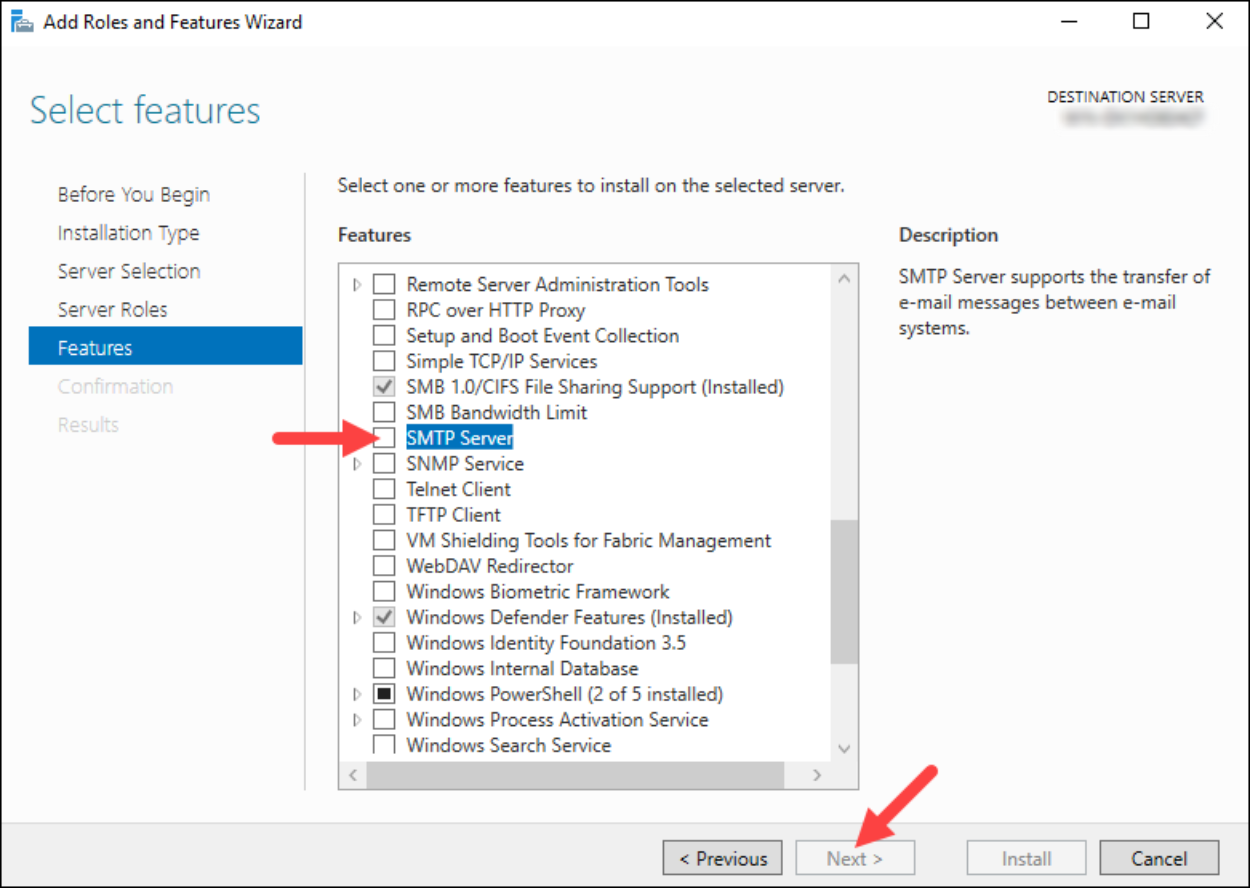
5. Select Features
The next step is to select which features to install. Check the box for SMTP Server. Click Next to continue.
6. Install Missing Features
Click Add Features to install the dependencies and Admin Console.

Install the Web Server Role
Skip the IIS role summary by clicking Next

Install Role Services
Check all the services you want to install for the Web Server role. The default options have been pre-selected. Next click Next to proceed to the last step once you are done selecting the services.

7. Installation Confirmation
The wizard displays a confirmation window with a summary of all roles, services, and features to be installed. Ensure that the option Restart destination server automatically if required is checked and click Install to complete the installation.

Once the installation is complete, click Close to exit the installation wizard.
SMTP Configuration on Windows
For SMTP server configuration using Internet Information Services (IIS) Manager 6.0. Here are the steps below:
1. Open IIS 6.0
Open IIS Manager 6.0 from the Server Manager dashboard.
Select the Tools option, and find Internet Information Services (IIS) Manager 6.0 from the dropdown menu:

2.Configure SMTP Virtual Server
In IIS Manager 6.0, you can right-click [SMTP Virtual Server #1].
Select Properties from the dropdown menu.

Step 3: Configure Relay
The relay option allows you to relay emails through an SMTP virtual server.
Configuring Server Access
1. In the [SMTP Virtual Server #1] properties, click the Access tab and select the Relay button:
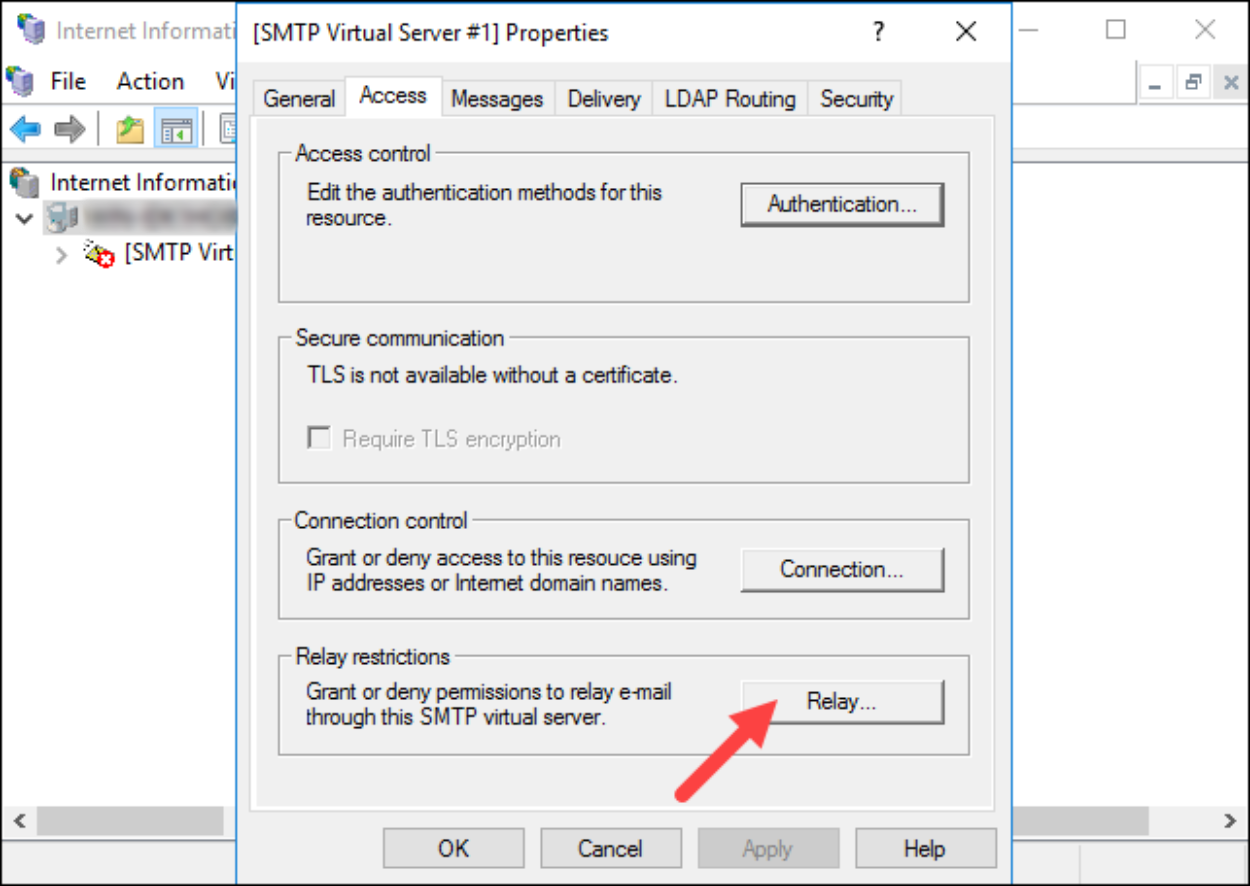
2. Select the Add... option to set which computers are allowed to relay emails through the SMTP server.
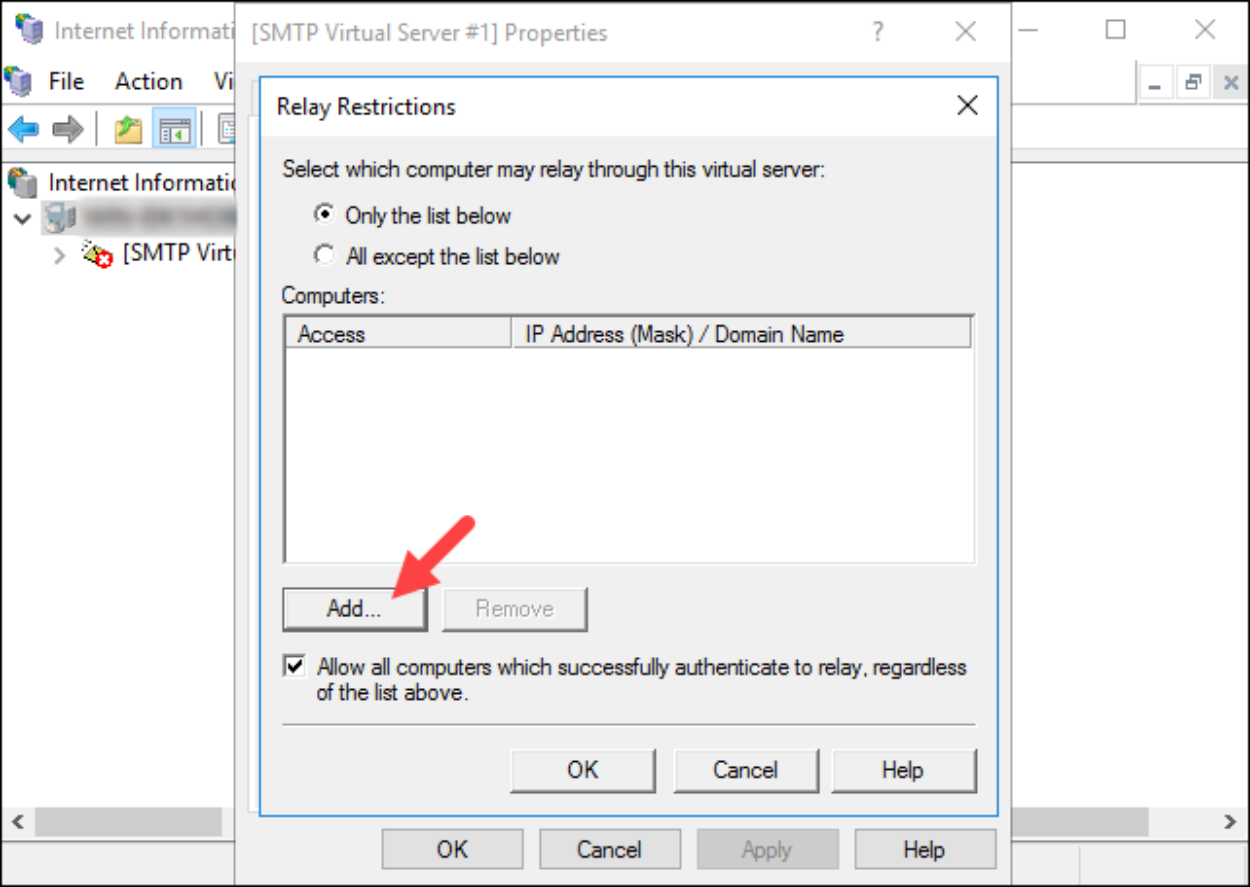
Select the Single Computer option and enter 127.0.0.1 to allow the localhost to relay emails through the SMTP server. You can also specify a group of computers using the Group computers option.
Click OK to confirm the changes.

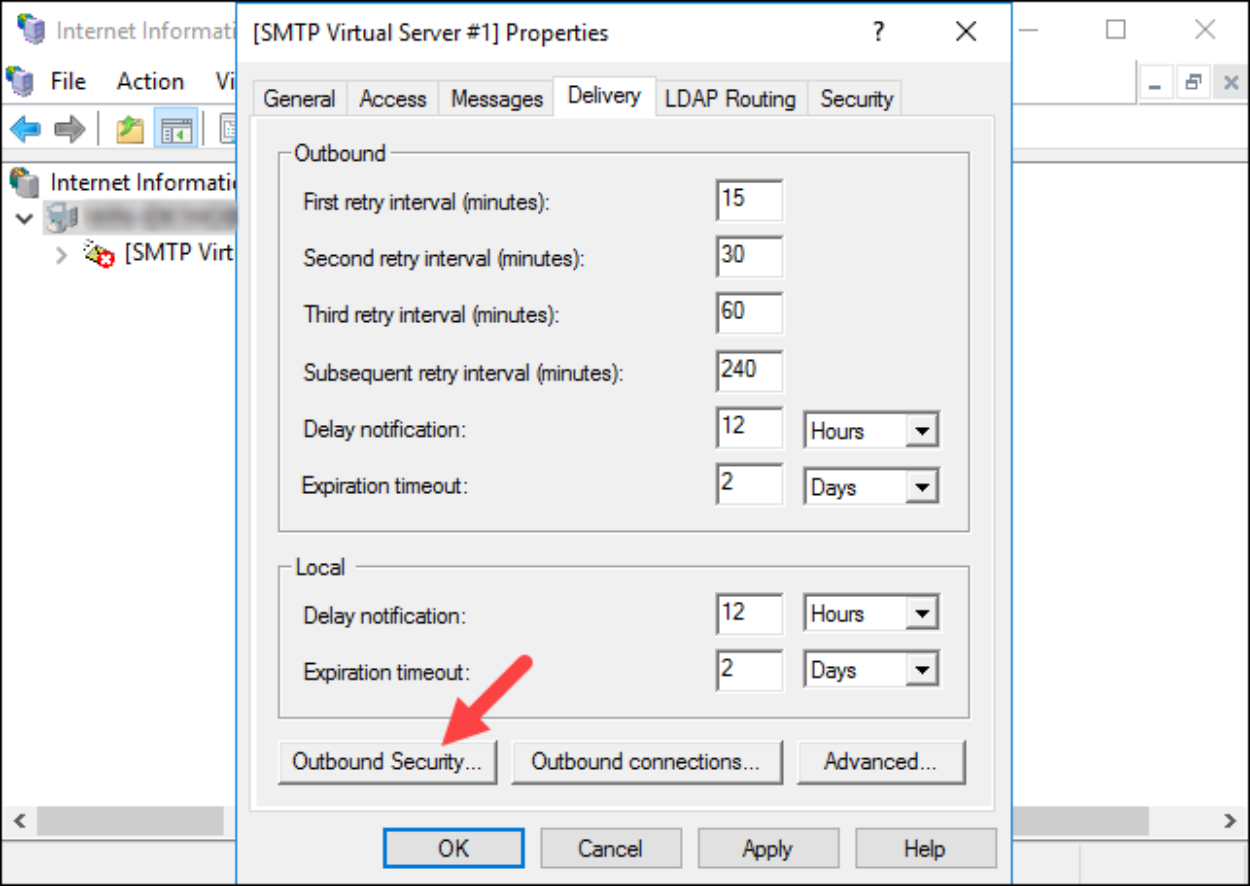
Step 4: Configure Security Options
The Delivery tab of [SMTP Virtual Server #1] properties contains different settings related to the interval of retrying to send outgoing emails after failed delivery, and different security options.
To configure the security options, click Outgoing Security.
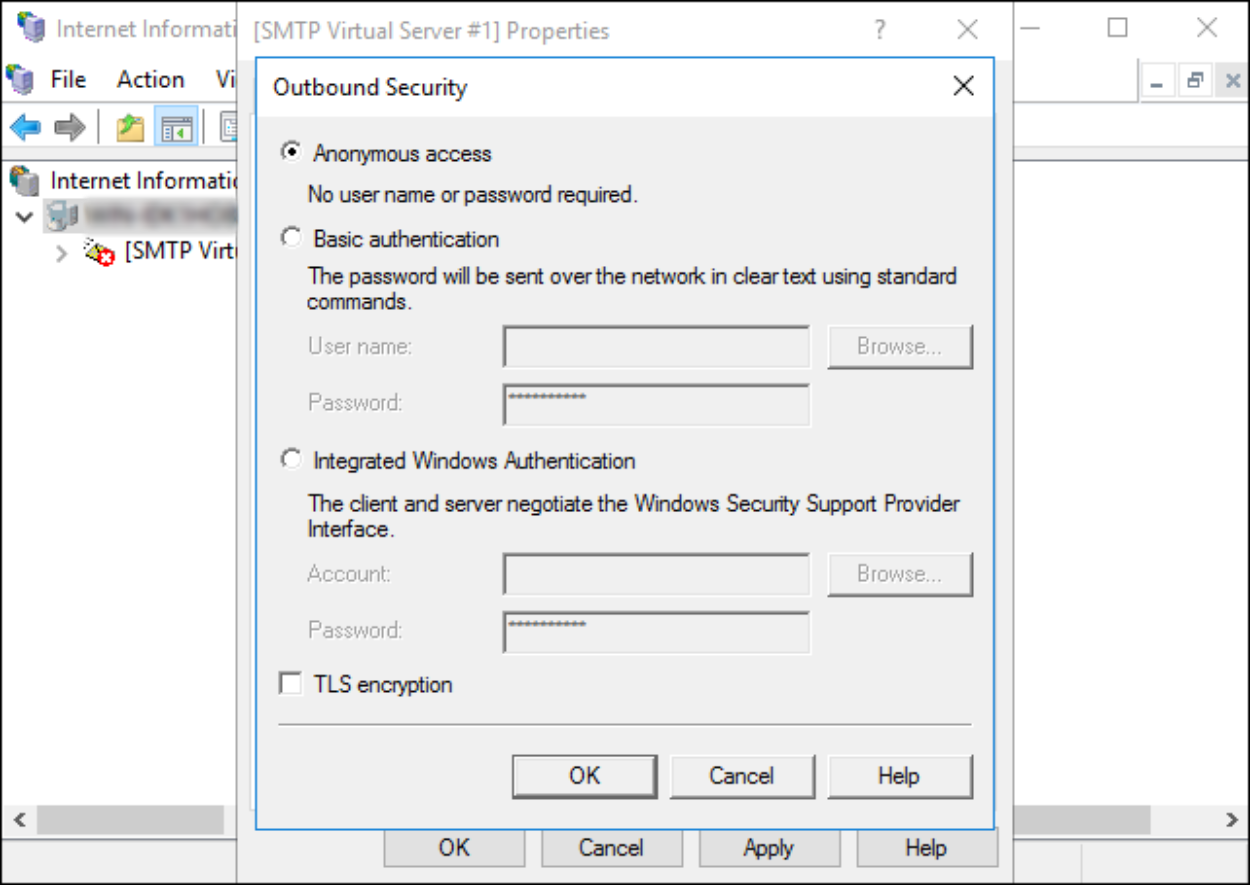
A pop-up window lets you choose one of four options to secure your SMTP server:
- Anonymous access. Disables SMTP server authentication as it does not require an account name or password.
- Basic authentication. Used when sending emails to personal or exchange accounts. This option passes the account name and password as clear text, so be sure to use TLS encryption if you choose this option.
- Integrated Windows authentication. Uses the Windows domain name and password for authentication.
- TLS encryption. Use TLS to secure the connection. This option requires you to install a valid SSL certificate on the server.
5: Restart SMTP Server
Restart the SMTP Server to apply the changes. Right-click [SMTP Virtual Server #1], select Stop, and then select Start.
